Wednesday, October 5, 2011
How to Change a Library Icon in Windows 8
EXAMPLE: Default Library Icons in Windows 8

NOTE: This is the built-in feature included in the Windows 8 Developer Preview. So far this option is grayed out for the other libraries, and is only available for a New Library though. We shall see if it gets enabled for the other libraries in the next release.
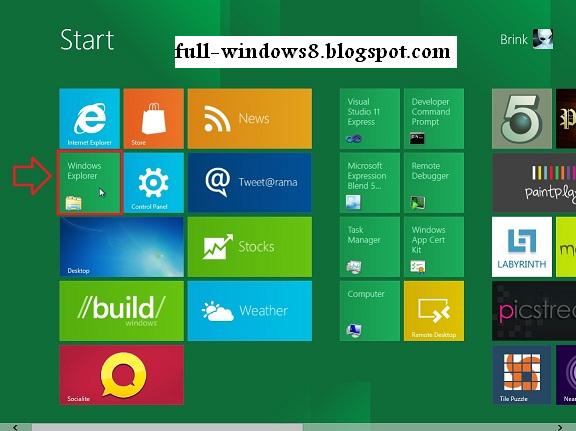
1. Open Windows Explorer. (see screenshot below)
2. Click on Libraries in the navigation pane in Windows Explorer, then right click on a New Library that you want to change the icon of and click on Properties. (see screenshot below)

3. Click on the Change library icon button. (see screenshot below)

4. Do either step 5 or 6 below for what you would like to do. (see screenshot below)

5. To Restore or Change a "New Library" Icon with a Icon from within a DLL FileNOTE: The default icon is available in the C:\Windows\System32\imageres.dll file.
A) Click on the Browse button. (see screenshot below step 4)
B) Navigate to and select another Windows 7 DLL file that contains the icon you would like to use, and click on Open. (see screenshot below)

C) Go to step 7.
6. To Change a "New Library" Icon with a ICO File of Your Choice
A) Click on the Browse button. (see screenshot below step 4)
B) Navigate to and select a .ico file that you want to use, then click on Open. (see screenshot below step 5B)
C) Continue on to step 7.
7. Select the icon you want to highlight it in blue, and click on OK. (see screenshot below step 4)
8. Click on OK. (see screenshot below step 3)
1. If you have not already, then click on the Download button below and download and save the ZIPfile below to your desktop. Next, extract (drag and drop) and the LibraryIconChanger.exe file from within the ZIP file.
Replace_Librarie_Icons_by_bluefisch200.zip

2. Run the LibraryIconChanger.exe file.
NOTE: This is a standalone EXE file that only runs and does not install on your computer.
3. In the right pane, select (highlight) the library that you want to change or restore the default icon of. (see screenshot below)
 4. Do either step 5, 6, or 7 below for what you would like to do.
5. To Change a Library Icon with a Icon from within a DLL File
NOTE: By default, the available DLL icons are from the C:\Windows\System32\imageres.dll file. If you would like to select a icon from within a different DLL icon, then click on the browse button, navigate to, and select the DLL file.
A) In the right pane, select an available icon, and click on the Select Icon from dll button. (see screenshot below step 3)
B) Go to step 8.
6. To Change a Library Icon with a ICO File of Your Choice
A) Click on the Select new Icon from file button. (see screenshot below step 3)
B) Navigate to and select a .ico file that you want to use, then click on Open.
C) Go to step 8.
7. To Restore the Default Icon of a Library
A) Click on the Restore default icon button. (see screenshot below step 3)
B) Continue on to step 8.
8. When finished, close the Libraries Icons program. (see screenshot below step 3)

OPTION ONE
To Change a "New Library" Icon in Windows 8NOTE: This is the built-in feature included in the Windows 8 Developer Preview. So far this option is grayed out for the other libraries, and is only available for a New Library though. We shall see if it gets enabled for the other libraries in the next release.
1. Open Windows Explorer. (see screenshot below)

2. Click on Libraries in the navigation pane in Windows Explorer, then right click on a New Library that you want to change the icon of and click on Properties. (see screenshot below)

3. Click on the Change library icon button. (see screenshot below)
4. Do either step 5 or 6 below for what you would like to do. (see screenshot below)
5. To Restore or Change a "New Library" Icon with a Icon from within a DLL FileNOTE: The default icon is available in the C:\Windows\System32\imageres.dll file.
A) Click on the Browse button. (see screenshot below step 4)
B) Navigate to and select another Windows 7 DLL file that contains the icon you would like to use, and click on Open. (see screenshot below)

C) Go to step 7.
6. To Change a "New Library" Icon with a ICO File of Your Choice
A) Click on the Browse button. (see screenshot below step 4)
B) Navigate to and select a .ico file that you want to use, then click on Open. (see screenshot below step 5B)
C) Continue on to step 7.
7. Select the icon you want to highlight it in blue, and click on OK. (see screenshot below step 4)
8. Click on OK. (see screenshot below step 3)
OPTION TWO
To Change Any Library Icon in Windows 8Replace_Librarie_Icons_by_bluefisch200.zip
2. Run the LibraryIconChanger.exe file.
NOTE: This is a standalone EXE file that only runs and does not install on your computer.
3. In the right pane, select (highlight) the library that you want to change or restore the default icon of. (see screenshot below)

5. To Change a Library Icon with a Icon from within a DLL File
NOTE: By default, the available DLL icons are from the C:\Windows\System32\imageres.dll file. If you would like to select a icon from within a different DLL icon, then click on the browse
A) In the right pane, select an available icon, and click on the Select Icon from dll button. (see screenshot below step 3)
B) Go to step 8.
6. To Change a Library Icon with a ICO File of Your Choice
A) Click on the Select new Icon from file button. (see screenshot below step 3)
B) Navigate to and select a .ico file that you want to use, then click on Open.
C) Go to step 8.
7. To Restore the Default Icon of a Library
A) Click on the Restore default icon button. (see screenshot below step 3)
B) Continue on to step 8.
8. When finished, close the Libraries Icons program. (see screenshot below step 3)
0 comments:
Post a Comment