Saturday, December 3, 2011
How To Dual Boot Windows XP And Windows 8
A few weeks ago, we published a detailed tutorial on how to dual boot Windows 8 and Windows 7. Just like Vista and Windows 7 users, Windows XP users may also like to install Windows 8 in dual boot with XP.

Procedure:


Just doing a simple search on Google or Bing reveals that installing Windows 8 in dual boot with Windows XP is not as easy as it sounds. Users are reporting that the Windows8 boot loader simply ignores the XP boot entry during installation. The result is you don’t get Windows XP entry in dual boot menu. So, if you are trying to install Windows 8 in dual boot with XP, make sure that you follow the every step given below to install and run Windows 8 in dual boot with Windows XP.
NOTE: We assume that your PC is running Windows XP and is bootable.
Procedure:
Step 1: As you are here to install Windows 8 on a separate partition, you first need to create a new partition or format an existing partition. We suggest a partition with minimum 20 GB free space (see Windows 8 system requirements).
To create a new partition you may need to use third-party tools such as the Partition Wizard (free). On the other hand, you can also simply format an existing drive (after moving your data) to make space for Windows 8. To format an existing partition, open My Computer, right-click on the drive that you want to format and select Format option to open Drive Properties. Here, select File System as NTFS and then click Format button to quickly format the drive.
Step 2: Once you are done with the new partition for Windows 8 installation, the next step is to download Windows 8 ISO from Microsoft. You can use these direct links to download your Windows 8 ISO. Both 32-bit and 64-bit Windows 8 versions are available at the download page. But if you are not sure which version of Windows 8 to download, we suggest you download 32-bit (x86) Windows 8.
Step 3: The next step is to create a bootable media. If your PC supports booting from USB drive, you can follow our step-by-step install Windows 8 from USB guide to create a bootable Windows 8 USB. You can also check out list of free software to create bootable Windows 8 USB.
Or
You can use Nero or any other burning software to burn the ISO file onto a DVD to create a Windows 8 bootable DVD.
Step 4: Insert your Windows 8 DVD into optical drive or connect Windows 8 USB drive to your PC, make necessary changes to the BIOS to boot from USB or DVD and restart your PC. If you have connected a bootable USB, the setup should begin automatically. And if you have used a bootable DVD, you may need to press any key when you see Press any key to continue message.
Step 5: From here on, follow our Windows 8 installation procedure (step-by-step guide) to complete Windows 8 installation on your system. Once done, reboot your PC and make sure that you get Earlier version of Windows option in the boot menu. If you can’t see your Windows XP entry (Earlier version of Windows entry) in the boot menu, follow the next step to add Windows XP entry to the boot loader.
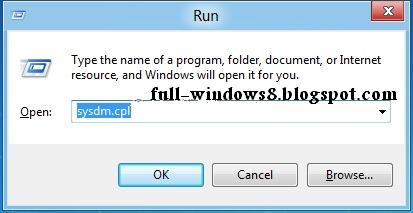
Step 6: Reboot your PC and boot into Windows 8. Open Run dialog box, type sysdm.cpland hit enter key to open System Properties dialog. Switch to Advanced tab, and clickSettings button under Startup and Recovery section. Here, select Earlier version of Windows as default operating system. Click Ok and then Apply button.
You are done! You have successfully added Windows XP boot entry to the boot loader. Reboot your PC to see Earlier version of Windows (Windows XP) entry in the boot menu. Good luck!
NOTE: The only downside of this method is that the graphical boot menu of Windows 8disappears after you set Windows XP as default OS.
0 comments:
Post a Comment